To say my indoor cycling season got off to a slow start this winter is a massive understatement.
To be completely frank, my outdoor cycling season last year pretty slowed dramatically after I had a big fall in July. It involved an ambulance ride, some stitches, and a full week off the bike. I just really didn’t recover physically or mentally from that for a while.
I mean, I got back on the bike, and I was only a little scared of riding again, but I had totally lost my momentum.
Once September and October rolled around my season might as well have been over. I was cycling less and less outdoors, not making it a priority, and by November it was cold and time to put my bike on the trainer.
I like to refer to myself as the Goldilocks of cycling temperatures. If it’s below 50 degrees outside? I’m out.
I don’t actually own any real cold weather cycling gear yet. I tell myself it’s because it’s expensive, but if I’m being honest, it also has quite a bit to do with the fact that cycling in the cold doesn’t appeal to me at all.
As I write this Chris is in the middle of a 90 mile group ride. Outside. It’s 28 degrees out. Please no. I will be riding inside for the foreseeable future, and Zwift is my current favorite riding app.
In this article I am going to give you 2 options (with step by step, no fuss instructions) on how to DIVE RIGHT IN and workout on Zwift once your trainer is all set up and you have the mechanical/tech side out of the way.
Option #1: Just Ride! No decisions needed! Just log in, ride, and get a simulation of riding on the road.
Option #2: Choose a Single Workout or a Training Plan: There are a lot of single workouts on Zwift (interval, tempo, etc.) with varying times and intensity. Alternatively, you can choose a plan with a specific goal in mind with multiple workouts over multiple weeks.
Not sure how to set up an account or what equipment you will need? This article from Bicycling magazine has a good overview, and for more details The Zwift website itself has you covered. I suggest checking out Zwift’s “Get Started” menu for more information.
In Zwift, there are a number of different options for riding. You can ride on a course, complete a stand alone workout, do a training plan, ride with a group, or join a zwift race. I have not really explored the racing/group ride option just yet, so I will be focusing here on general riding, workouts, and training plans.
Another cool thing about Zwift is you are riding a course with other people in real time. You can interact with other riders on the course, chat, give them a “ride on!” and other social things. As neat as all of this stuff is, this article will keep things as simple as possible and focus on the basics.
When you’re just starting, I don’t want you to get bogged down in the “what should I do?!” analysis paralysis like I did. I want you to be able to bypass all of the clutter, all of the fuss, and JUST GET ON YOUR BIKE.
Option #1: Just Ride!
Yes, this truly is an option, and in my opinion a great way to get started and get a feel for what Zwift is like. It’s also a neat simulation of actually riding on the road. If you aren’t sure of your FTP (or even what FTP is!), don’t feel like taking an FTP test, don’t want to stress yourself out in any way? If you just want to just ride your bike? This is the option for you.
Step 1: Open Your Zwift App and Hit That Little Play Button Yup! That’s it!
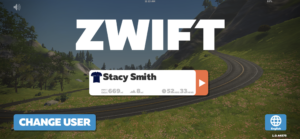
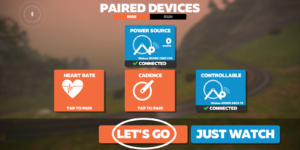
Step 2: Decide Which Devices You Will Pair Then Click “Let’s Go”
This will depend on your set up. I actually pair them all because I like to know my heart rate, etc. while riding. You don’t need all this information if you don’t have the necessary equipment so only pair what you need. Sometimes I forget to put my heart rate monitor on and just want to ride, so I skip that pairing.
Step 3: Choose Your World and Route
So, I used to skip this step and let Zwift “surprise me”. Last night Zwift decided to surprise me by sending me straight up an hour-long mountain.
At times the grade was so steep I couldn’t really even turn the pedals unless I stood up. This was not quite the surprise I was looking for. I did get a great workout, but this can be really discouraging and even harmful if you aren’t anticipating it!
There are always two worlds available, and multiple routes within each world. Since you can stop at any time the distance of the route isn’t so important, but I learned last night to definitely be mindful of the elevation. If you are a beginner cyclist I would stay in the 500-1000ft range for sure.
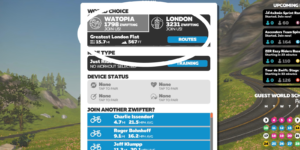
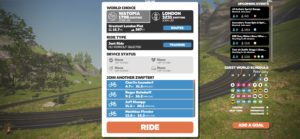
Step 4: Hit the Orange Button on the Bottom That Says “Ride”
And then start pedaling! I kid you not, it is really this easy.
Step 5: Ride for as Long or as Far as You Like.
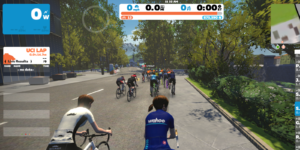
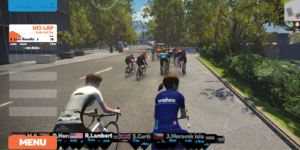
The graphic at the top of the screen here tells you how fast you are going, how many miles you have ridden, and how long you have been riding for. Sometimes I will ride for an hour, sometimes I will ride for a certain number of miles…it’s completely up to you! You will just lap the course until you choose to stop, or at times you will be offered a different path to take on the bottom of your screen that you can click on if you choose. That’s it!
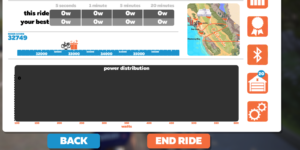
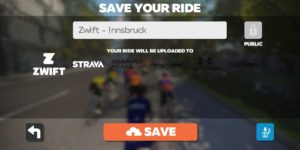
Step 6: When You’re Done Hit “Menu,” “End Ride,” then “Save”
You will then have the option of saving your ride and even uploading it to a variety of other apps such as Strava or Training Peaks if you so desire. I am a Strava girl and like to keep track of my mileage this way, so that’s why Strava is highlighted for me. You also have the option here of deleting the ride if for whatever reason you do not want to keep a record of it anywhere. And that’s it!
Option #2: Select a Zwift Training Plan or Workout
This option requires a little more thought and planning than doing a simulated ride (option #1), but it’s so awesome if you are looking for a structured way to get through the winter. It is also great if you are training for an event and aren’t really able to ride outdoors much in the lead up to the event.
Below are the simple steps to follow to choose a training plan or workout on Zwift.
Step #1. Go to the Website What’s on Zwift
Here you can see what training plans and single workouts are available. This site offers a comprehensive list of the Zwift training plans and detailed information regarding each workout so that you can find one that suits your time and intensity needs.
Step #2. Consider Your Time frame and Schedule if You are Choosing a Zwift Training Plan
You will want to ask yourself these three things:
- How many weeks you will be training.
- How many hours per week you have available to train.
- Your level of cycling fitness (beginner, intermediate, advanced)
My advice? If you are just starting out with Zwift, pick a plan on the lower end of the time commitment scale. You can always ride more often and add stuff in (see options #1 and #2), but I find that it can be kind of demoralizing when you sign up for a workout plan and can’t actually complete all of the workouts.
Be sure to look at all of the workouts in a plan. There’s nothing worse than having all this excitement about a training plan, getting halfway through, and then realizing the workouts are getting to be upwards of 2 hours long each and you just don’t have that kind of time.
Earlier this winter I chose a plan that was too much (“FTP Builder”), and I wish I went for the “quick win” of a less time consuming plan to keep myself motivated until I was ready to commit more days/hours of working out.
In the beginning of January I started the “Fondo” plan even though I am not training for a Fondo and this was perfect…an average of 3 one-hour workouts a week for four weeks.
Now that I am in the habit of doing multiple scheduled rides a week and just completed the “Fondo,” I am considering the “FTP Builder” plan that I started earlier. Both are beginner plans and are on par with the time commitment I can make right now.
Step #3: Take an FTP Test First If You Are Using a Smart Trainer
Some plans, such as the Zwift 101 plan, have an FTP (Functional Threshold Power) test built in, but most that I have tried do not. The purpose of an FTP test is to give Zwift a base-line for how hard a smart trainer makes the workouts in your training plan.
To take an FTP test:
Open Zwift and Hit Play

Pair Your Devices

Next to “Ride Type” click the blue “Training” button
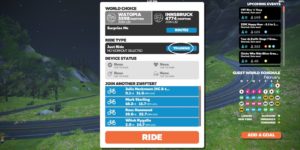
Make sure the “Workout” tab is highlighted, the “FTP Test” pull down is selected, and choose a test. I like the shorter FTP test selected because it gives you a little workout with the test. If you are short on time I would elect to do the ramp test as you will likely max out way before the 43 minutes are up.
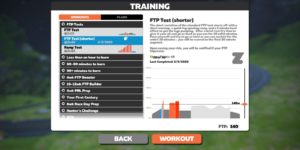
Hit the Workout Button, and on the next screen, click “Ride,” and start pedaling!
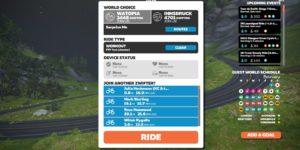
When You’re Done Hit “Menu” then “End Ride.” You will have the option of saving your ride here just like you do in simulation rides. Once you complete the workout Zwift will record your FTP and use it for future workouts.


*** Note: I like to make sure ERG mode is on for this (available with smart trainers) because your trainer will use the ERG mode in the warm up phases. I had ERG off on an FTP test once and the warm up destroyed me before I even got to the actual FTP part of the test!
Step #4: Select and Start Your Zwift Training Plan or Workout
Now it’s time to actually get your ride on! I usually do this the day after an FTP test, but maybe you are more hardcore than I am and you want to jump right in as soon as you finish the test. Go for it!
Follow items 1-3 Under “Take an FTP Test” in Step #3 Above (Open Zwift, Hit Play, Pair Devices, Next to “Ride Type” click the blue “Training” button)
Highlight the “Workout” Tab for Workouts and the “Plans” Tab for Training Plans
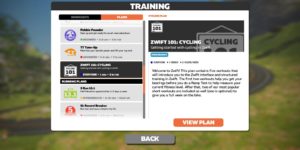
Scroll Through and Find Your Chosen Workout/Training Plan then click “Enroll” for a Plan or “Workout” for a Workout (if it’s a workout you can skip the following steps and just ride!)
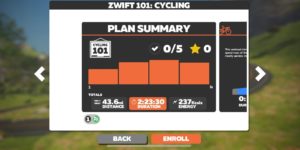
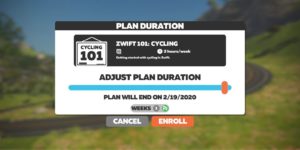
“Enroll” if it’s a Plan, and Then click “Workout” twice and go!
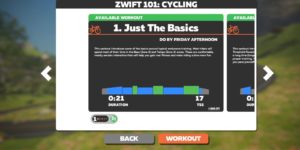
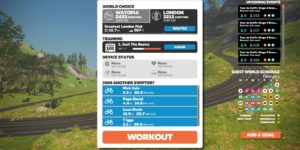
If you chose a workout plan then Zwift will prompt you when to complete each workout (ie: by Tuesday morning) and it will give you the option of continuning your workout plan each time you log in. It’s that easy!
Step #5: Relish in the Glory of your Completed Workout/Training Plan and Decide What’s Next!
You did it! You completed a Zwift Workout or a Zwift Training Plan!
Be sure to keep the momentum going and choose your next workout or plan. Or, if this was simply a workout plan to get you through the winter and spring is here, take that bike off the trainer and get out there on the road!
What are your favorite workouts or training plans on Zwift? Or do you prefer to just get out there and do a ride simulation? Do you have any additional questions about Zwift or any other Zwift topics you would like to see covered?
Leave a comment and let me know below!
I hope you found this Girl’s Quick Start Guide to Zwift helpful. Now, if you’ll excuse me, I have a training plan to begin!
xoxo
Stacy

Leave a Reply